Docusign Setup
Introduction
These instructions will outline how to:
- Create a single app integration for a property in the Docusign demo interface
- Setting up the private key that you can use in one or more integrations
- How to authorise the user ID that you will be entering into the setup form
- Copying the app credentials from Docusign into the Levart Docusign Setup form
- Saving the Docusign Setup form and checking the API connections
- Finalising the setup for production via the "Go Live" process
A number of properties each now have their respective credentials added via the Docusign Setup form. Here's Toowong for reference:
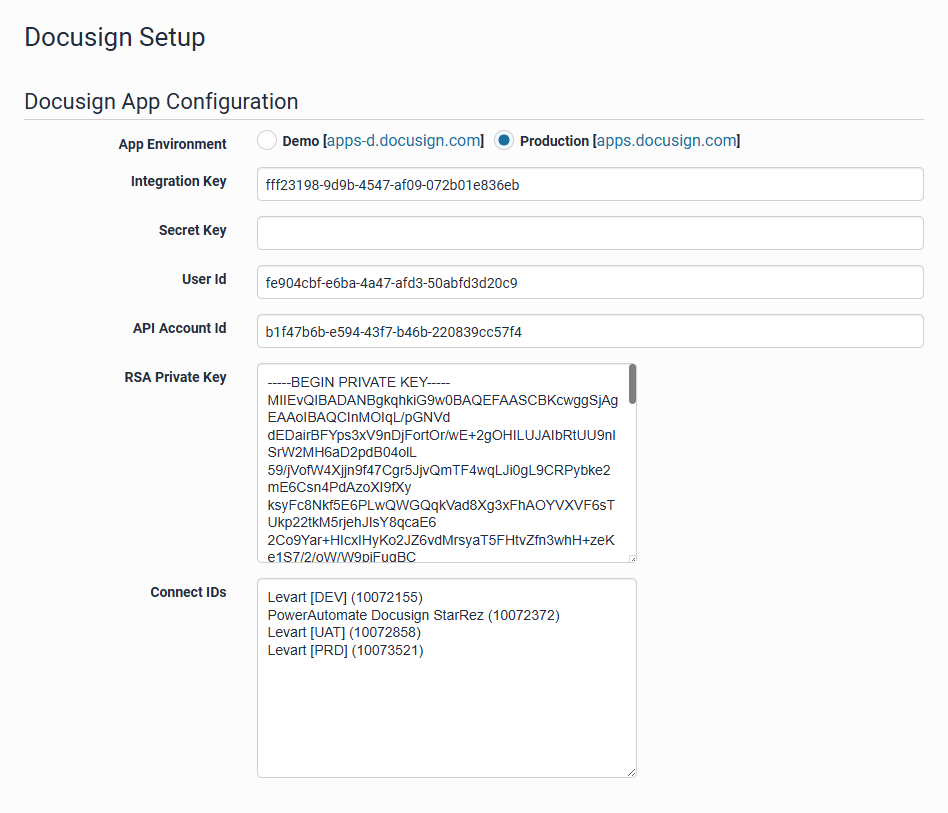
Firstly you will notice the "App Environment" selection. You can safely toggle this to Demo then click Save.
Note that if you use demo details on UAT/production before the app integration is on production (or production details for the demo environment) -- it will show an error, but the only impact will be that it can't load the Templates list and any Connect profiles.
Create a single app integration for a property in the Docusign demo interface
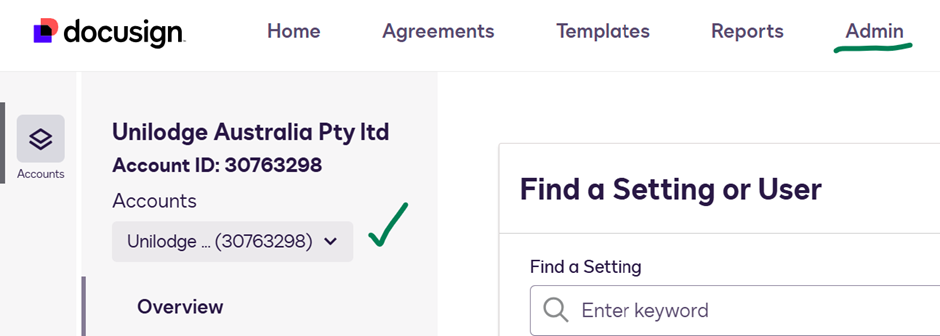
Before we can fill in the Docusign Setup form we need to sign into Docusign's demo interface: https://apps-d.docusign.com/admin/admin-dashboard
You should be under the primary Unilodge account. All of the integrations on Demo are under one account, but will later each go to a single account on production.
Navigate down the left side menu and click on "Apps and Keys":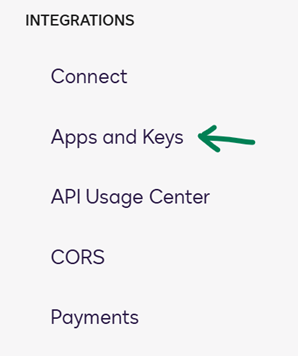
You should see a list of Apps and Integration keys similar to this:
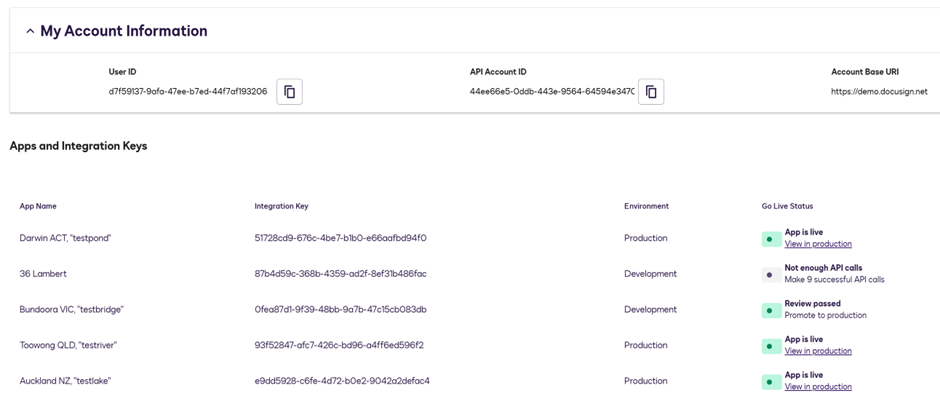
You can now go ahead with creating the Apps in the same place for all of the corresponding sub-accounts (one for each property).
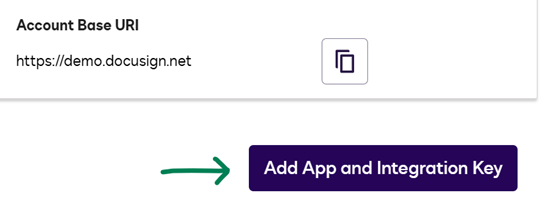
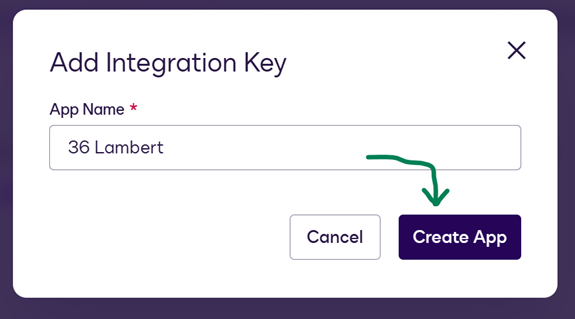
- Click "Add App and Integration Key", give it a short name to match the intended sub-account, and click Create.
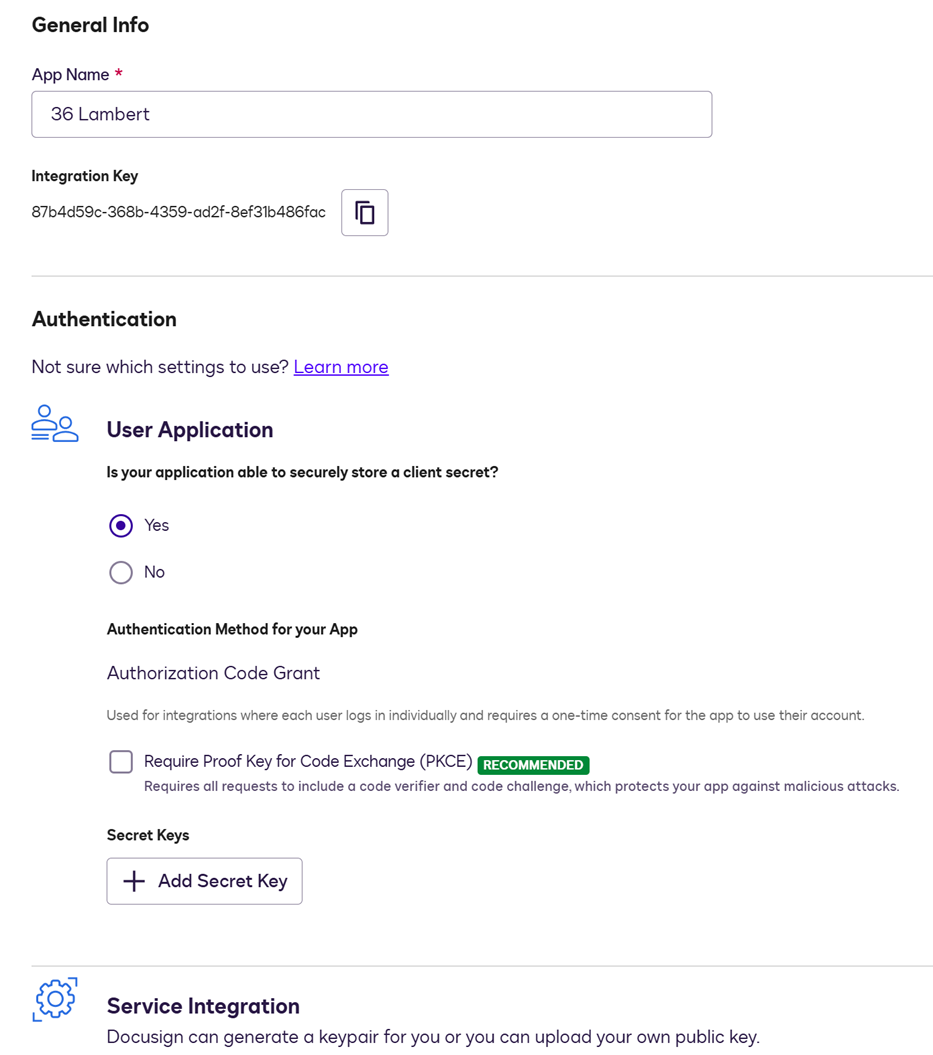
- Ignore "Secret Keys", (and you can ignore this in the Levart setup form too -- it's for dev use only right now).
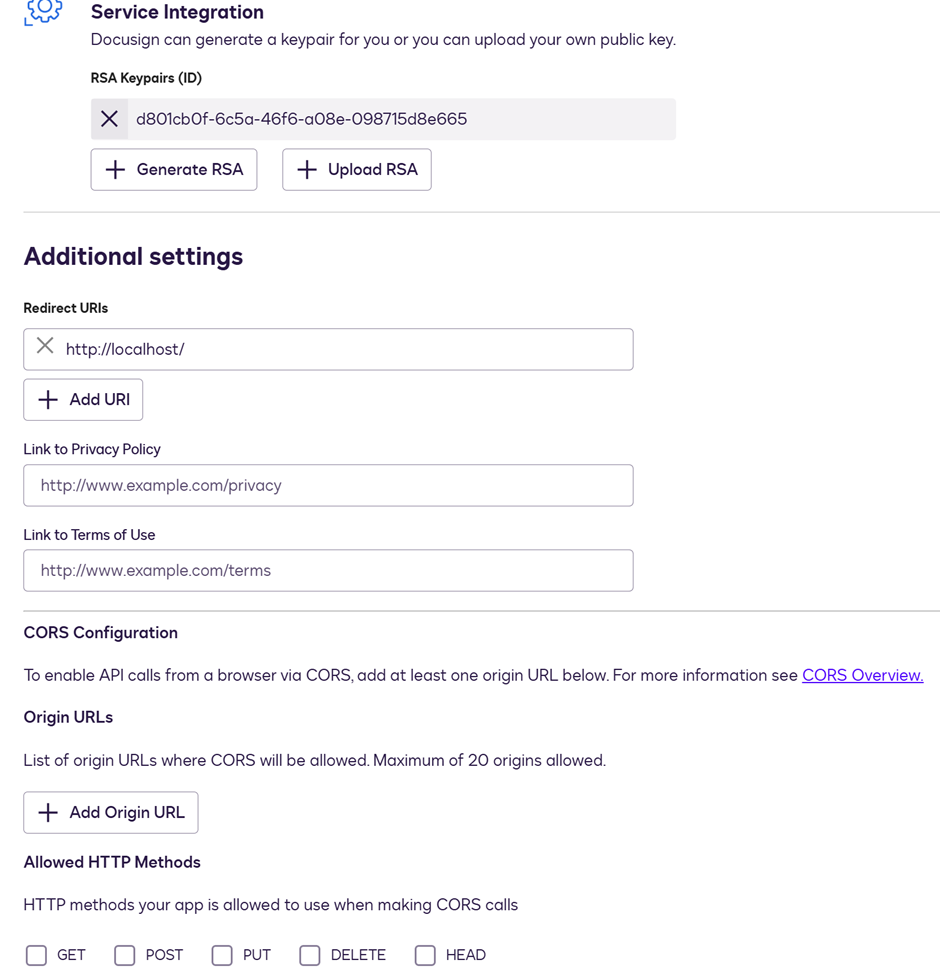
- Upload an RSA public key under Service Integration, (or generate one -- but I'd suggest do this once and save it somewhere within reach for the remaining)
- Click "Add URI" under Redirect URIs and enter "http://localhost/"
- Scroll down and click Save
Followed by these steps in the next section:
- Note the Integration Key and update the spreadsheet: https://1drv.ms/x/c/fd2a61fbc9f9ea20/Ebyq3IXFNXlKjXWF6L3RsJwBdz9WfJaRDVGnVq7x9DUuRQ?e=4U5XFh
- Use the OAuth user consent URL to authorize the app's access to your user account
- Fill in the Docusign Setup form (for the UAT site) under the Levart admin area (everything except secret key, environment is Demo) and click Save
- Start refreshing the Setup page periodically, (it will eventually run down the 20 APIs calls counter by loading the template list)
Leave the default values here and scroll down:
Until you come to the RSA Keypairs:
Setting up the private key that you can use in one or more integrations
Whether to Generate or Upload depends on personal choice. If you are doing this for the first time, we recommend generating an RSA keypair. Do as instructed and save the private & public keys somewhere safe in a text file.Since there are a number of properties to be added, we suggest using your existing public key (that you generated prior, and which you have a copy of the private key for already).
In this scenario click "Upload RSA" and paste the public key:

As per the bulleted list of items above, paste in the localhost URL under Redirect URIs (also shown in screenshot above under "Additional settings").
Scroll to the bottom and click Save: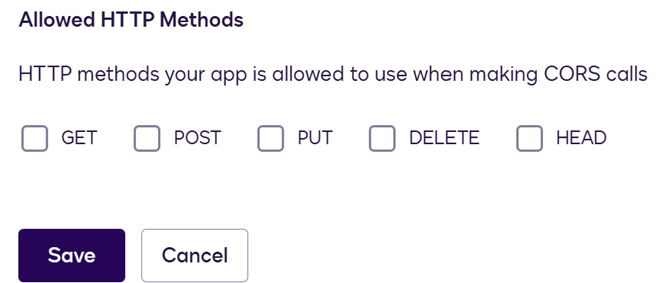
How to authorise the user ID that you will be entering into the setup form
It is now helpful to enter the Integration Key for the new App into the Docusign Accounts spreadsheet. This will create the User Consent URL automatically. It will have the following structure:
https://account-d.docusign.com/oauth/auth?response_type=code&scope=signature%20impersonation&client_id=<integration_key>&redirect_uri=http://localhost/ |
Example for "36 Lambert": https://account-d.docusign.com/oauth/auth?response_type=code&scope=signature%20impersonation&client_id=87b4d59c-368b-4359-ad2f-8ef31b486fac&redirect_uri=http://localhost/
Copy & paste the full URL into your browser and follow the prompts to sign in and permit the App to access your user account. If successful it will return a code in the URL, but otherwise the page will appear blank or even have a connection error: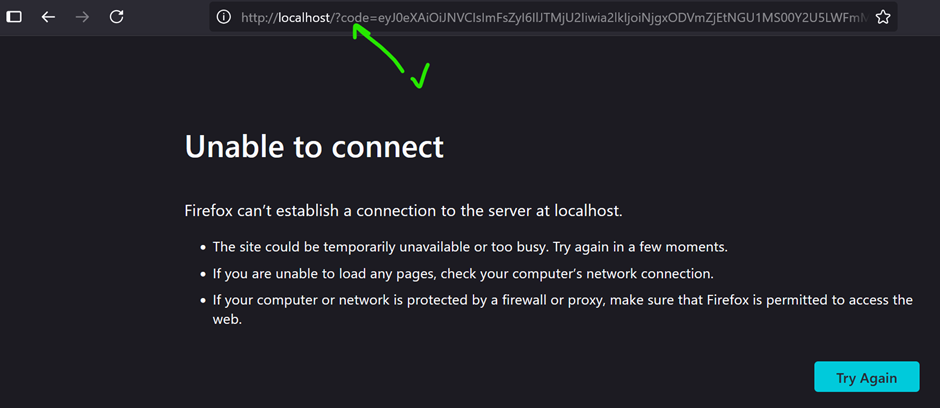
This is completely normal. The code/token can be used by developers but we don't need to save it here.
Copying the app credentials from Docusign into the Levart Docusign Setup form
With your Docusign demo app integrations (under Apps and Keys) open in one browser tab, open another to the property you need to set up. In this example we're using "36 Lambert": https://uat.36lambert.reserve.unilodge.com.au/adminDocusignSetup.html
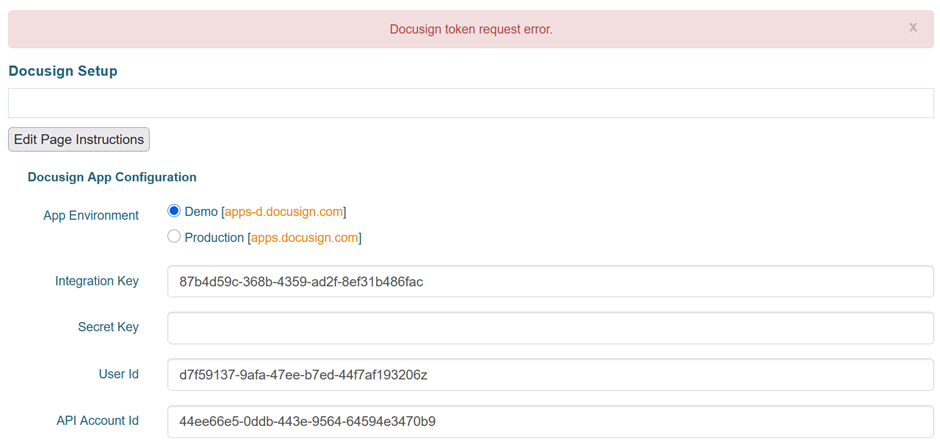
Go ahead and copy & paste your User ID and API Account ID into the corresponding fields of the setup form.
Also copy the integration Key from the corresponding App (next to App Name) and paste that into the Integration Key field.
Finally, copy the private key portion of your RSA keypair that you saved earlier, and paste that into the RSA Private Key field.
You can click Save now, however unless your user has already been authenticated already (in the step prior) you will likely see a token error or similar:
Saving the Docusign Setup form and checking the API connections
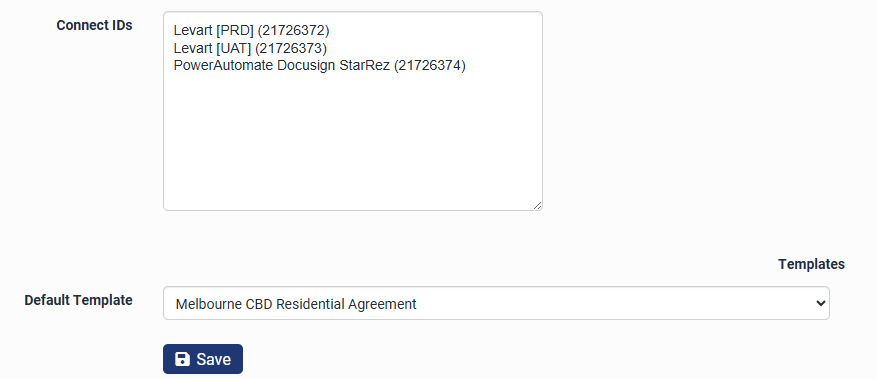
On success you won't see any errors and you should be able to select a Default Template if one is available. Connect IDs will also be listed:
Every click of "Save" triggers a connection to the Docusign API. It can take anywhere from 5-10 minutes, but eventually these connections will be deducted from the required "successful API calls" counter.
This starts at 20 connections required, and must reach 0 before the App can be promoted to production:![]()
It is not necessary to continually click "Save" if the API is being used to process document envelopes. Just through normal usage the required API call counter will go down.
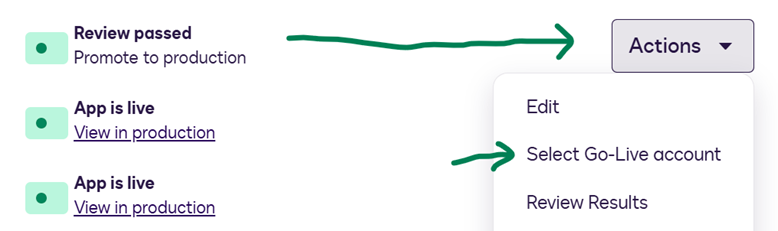
Finalising the setup for production via the "Go Live" process
Once the App is ready to go to production:

Simply click the Actions menu, "Select Go-Live account" and follow the prompts:
It is up to the production account holder to sign into the production Docusign service with their credentials in order to select one of the Unilodge sub-accounts to link the new App integration. This is outside Levart's purview.