Galleries
Creating galleries
A "gallery" is any set of images grouped together. The Galleries can then be assigned to various areas of the website, such as the header slideshows, room types and the Image Gallery page.
Before creating any gallery, ensure all your required images have been uploaded to the Library page.
Firstly to create a gallery, go to Media > Galleries and click on the +New button. Enter in a name for the gallery,
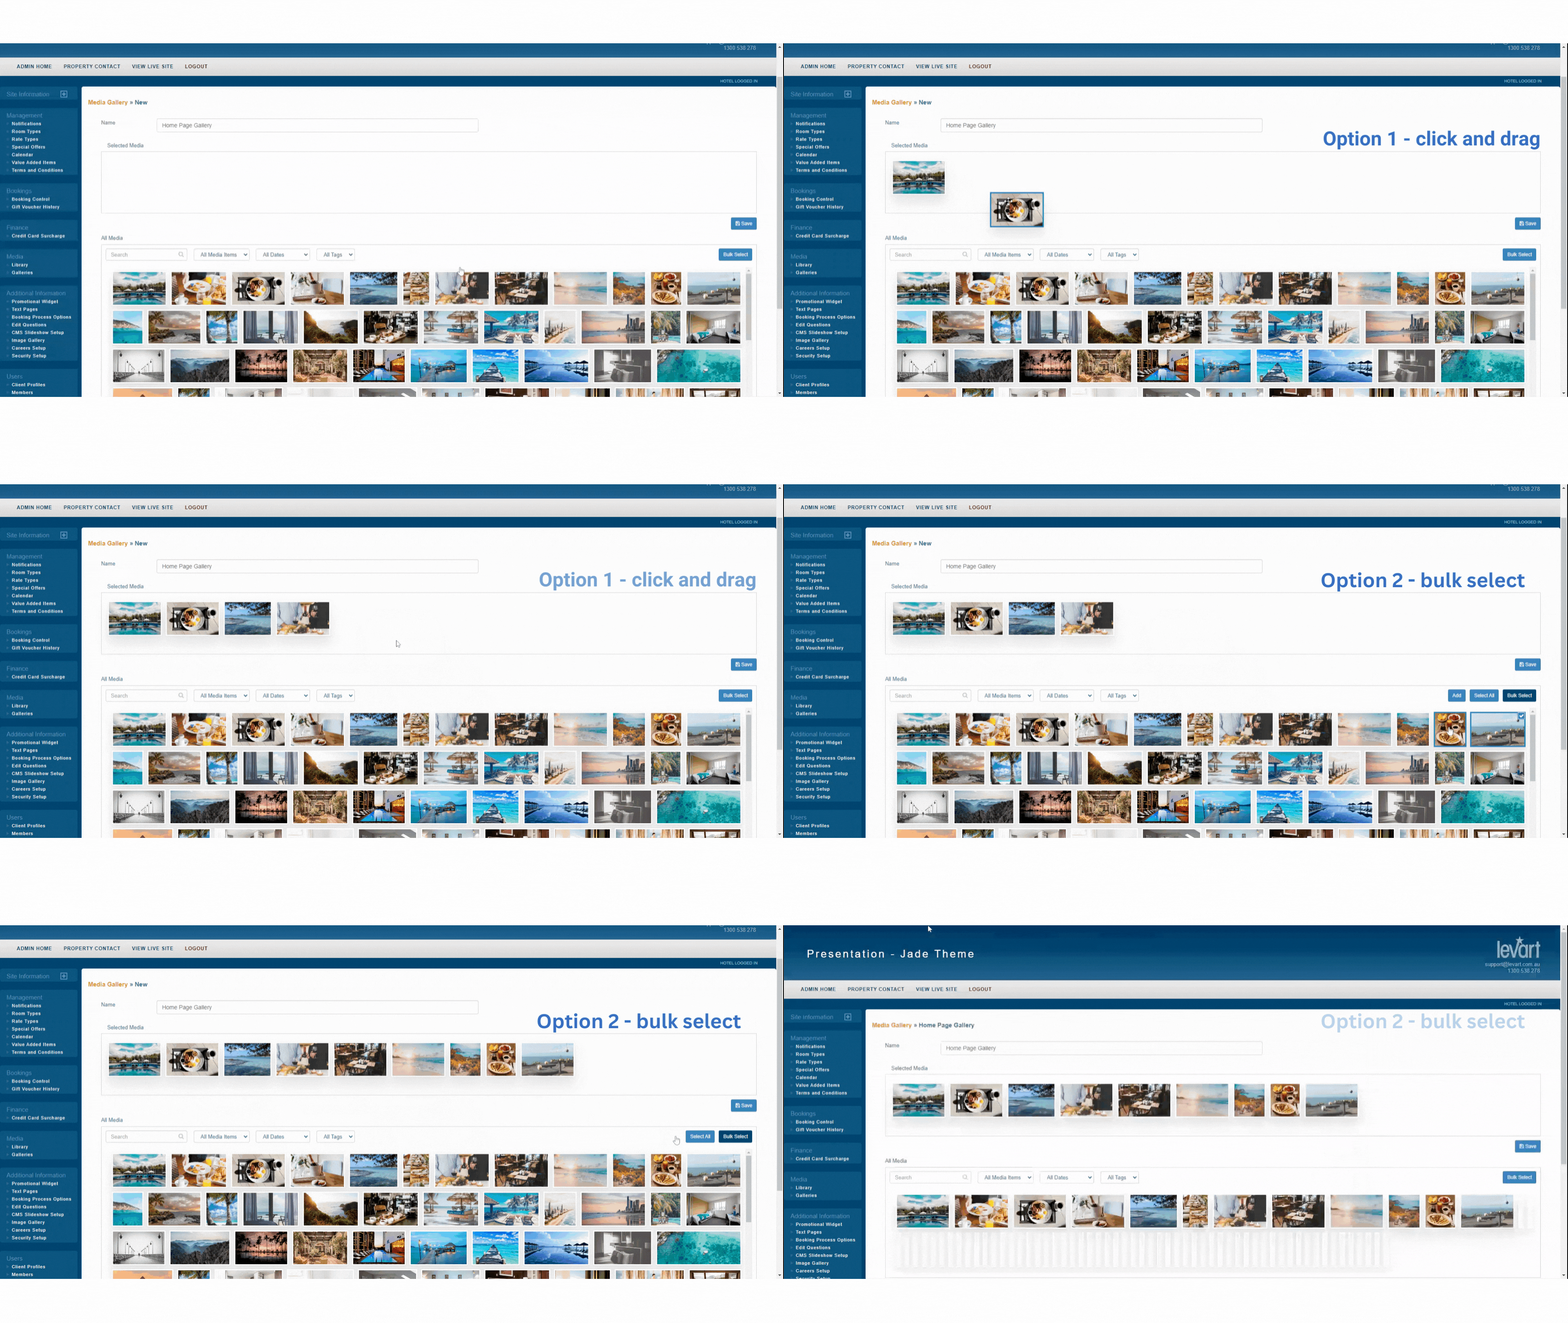
To add images to this gallery you can either
- Click and drag images up from the All Media section, one-by-one; or
- Click Bulk Select > select all the images you require > click Add.
See example below for both options. Ensure you click Save when you have finished.
To change the order of the images, click and drag them into their required position in the Selected Media box.
To edit an existing gallery, return to the Media > Gallery page and click on the gallery name or edit icon:
How to assign galleries and images to all website areas
Header Slideshow
The header slideshow is the large image/s that display in the top banner of your website. These were previously managed under CMS Slideshow Setup.
Go to Site Information > select the page you would like to assign a header image/s to. Scroll to the Header Slideshow section. Use the dropdown to select a gallery that you have created.
If you would only like one image in the header for a page, scroll to the bottom of the list and select Single Media File. The Image Library will then pop up and you can select the single image.
If you do not assign an image or gallery to the header for a page, it will default to using the one used by the Home Page.
Room Types
All room types have a pre-made gallery that will always be assigned to that room. This gallery cannot be deleted.
To edit the photos within room gallery, go to Site Information > Rooms/Apartments/Accommodation > select the room type > next to Room Gallery click Add Images. Add extra images to the gallery following the instructions above (under "Creating Galleries").
You can also access the room galleries by going to Media > Galleries > click on the gallery [room name] gallery.
Image Galleries
1. Home Page Gallery
*This is the gallery that is inserted into your Home Page text. It is separate to your Header Slideshow outlined above.
Under Site Information > Home > scroll to the dropdown Gallery. Choose your gallery from the dropdown and click Update Now to save.
2. Gallery Page
*The Image Gallery page is a separate page on your website where you may have multiple types of sub-galleries, e.g. Rooms, Facilities, Location etc.
Go to Site Information > Image Gallery > Add New Gallery or click on an existing gallery to edit.
- Tick the Display box
- Enter the name of the gallery in Section Title
- Click the Auto button next to Custom URL
- Scroll down the the Gallery dropdown and assign the gallery required.
- Click Update Now to save
If you have any questions please contact Levart Support on support@levart.com.au.


