Booking Control
Overview
Levart’s Booking Control is a comprehensive list of all bookings that have been imported into your Levart system, from your Booking Engine or via third party sites that are linked via Channel Control.
Note
Bookings from external sites that are not connected to your Channel Control will not import to Levart.
Booking Control
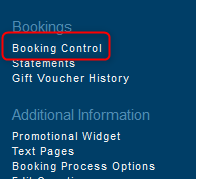
In your Levart Admin site, click Booking Control under the Bookings heading
Display
This is a list of the bookings as they have been imported to your Levart system. They are listed in chronological order, with the most recent booking at the top.
You can add additional, or remove existing filter fields by scrolling to the bottom of the page and checking or unchecking the relevant filters.
When performing a search, you can choose to display up to 200 bookings per page, this is adjusted by clicking on the drop down box next to the word display.
A guest’s booking reference number is highlighted in orange. Clicking it will open the relevant booking details:
This booking summary contains all relevant details about the booking aside from payment details.
Credit card details for bookings made via your Booking Engine are sent to you via encrypted email. Booking.com and Expedia bookings can be accessed via Channel Control – External Booking Summary – Original and Imported respectively. These are only accessible until the day before the first day of stay.
Filters
Your filters are effectively the tools that help you narrow down a search so that the bookings you’re looking for can be located more quickly. This is great for finding individual bookings or even for getting a list of bookings booked on a common criteria (i.e. booking booked on the same rate). Different filters allow for these varied search results.
By default, bookings are displayed in the order they have imported, with newest bookings at the top. You can sort your bookings by any header fields by clicking the arrow icon next to that field name. Clicking the icon again will swap the order of bookings.
Reference
This field allows you to search by most basic and specific filter, using the unique booking reference number. Bookings made on your channels will import with the channel’s booking reference number.
Partial reference number searches will display relevant results.
Source
Bookings can be viewed based on where they were made. You are able to filter by Levart bookings, Levart External Bookings or Channel bookings. You can narrow your results by a sub-field or by a specific source.
Profile
The Profile field allows you to filter bookings by Client Profiles or Promo Codes. You can sort by all Promo Codes or all Client Profiles, or narrow your results to a specific one.
Surname
You are able to search bookings by specific Surnames by entering a relevant guest surname into the Surname text field.
Room
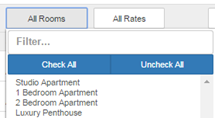
This field allows you to search for bookings based on the room type the booking was made on. You have the ability to type into the Filter textbox to find a specific room, Check and Uncheck all rooms or click and drag down to select multiple room types.
Rate
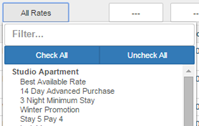
This field allows you to search for bookings based on the rate type the booking was made on. You have the ability to type into the Filter textbox to find a specific rate, Check and Uncheck all rates or click and drag down to select multiple rate types.
Check In
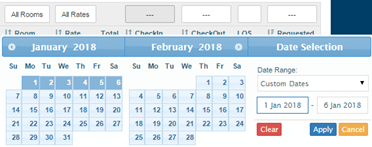
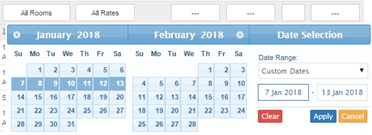
Bookings can be viewed from the date of check in via a custom date range. This allows you to filter bookings by guests due to arrive on a certain day or range of dates.
Clicking a date on the date picker will automatically fill the From date field, and clicking another future date on the calendar will fill the To date field. Click Apply to apply the filter, Clear to start a new date selection, or Cancel to sort by a different filter.
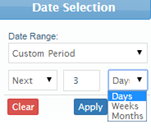
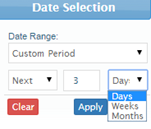
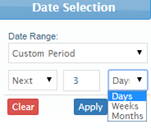
Selecting Custom Period from the Date Range drop down allows you to select Next or Previous Day, Week or Month filters.
Check Out
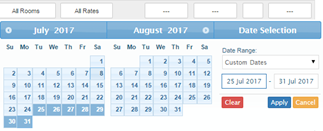
Bookings can be viewed from the date of check out via a custom date range. This allows you to filter bookings by guests due to depart on a certain day or range of dates.
Clicking a date on the date picker will automatically fill the From date field, and clicking another future date on the calendar will fill the To date field. Click Apply to apply the filter, Clear to start a new date selection, or Cancel to sort by a different filter.
Selecting Custom Period from the Date Range drop down allows you to select Next or Previous Day, Week or Month filters.
Length of Stay
Filter your bookings by their length of stay by typing a number into the LOS text field.
Date Requested
Bookings are filtered by Requested by default, with newest bookings displayed at the top of the Booking Control page.
You are able to search bookings based on the day the booking was made. This can also be done by range by clicking a date on the date picker, which will automatically fill the From date field, and clicking another future date on the calendar will fill the To date field. Click Apply to apply the filter, Clear to start a new date selection, or Cancel to sort by a different filter.
This is useful for tracking marketing, offers and special limited time deals.
Selecting Custom Period from the Date Range dropdown allows you to select Next or Previous Day, Week or Month filters.
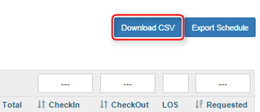
Download CSV
You are able to download a file of bookings displayed in Booking Control by clicking Download CSV. This document will sort bookings based on the Filters you searched by, and will include all details displayed on the Booking Control page.
Export Schedule
You are able to schedule a report to be automatically emailed to you based on the filters selected in Booking Control. These reports can be sent by Email Attachment, Inline or FTP.
Once you have selected the relevant fields in Booking Control, click Export Schedule to schedule your report.
Note
If you are scheduling future emails with date fields, ensure you use the correct Date Selection Filter. The Custom Period filter will ensure bookings can be sorted by Next or Previous dates, not specific dates, or you will be continually sent the same report for those specific dates.
Details
Type the name you wish to title this export schedule in the Export Name Field.
Ensure the Columns and Filters are those you wish to receive in your schedule.
Targets
Select the format you wish to receive your schedule in from the Targets drop down menu. An Email Attachment will send a CSV file as an attachment to your email. This is the recommended schedule format, as it is easier to sort and view large amounts of data. An Inline Email will send the booking data in the content of an email. An FTP target will upload a CSV to your server.
For email schedules, enter your email address in the Email field and click Test Schedule to ensure the report has the correct filters and fields.
For FTP schedules, enter Host, Port, Path, Username and Password details in their relevant fields and press Test Schedule to ensure the report is running correctly.
Schedule
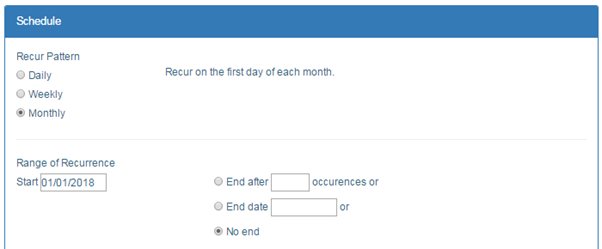
Reports can be sent to you Daily, Weekly or Monthly.
Note
All bookings are recorded in local property time. Booking Control on portal sites will display in local portal time.
All email schedules will be run at midnight AWST (GMT+8).
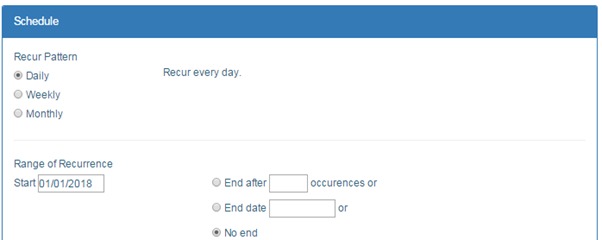
Daily
Daily reports will be sent to you every day.
Set the Range of Recurrence start date to be the day that you wish to begin receiving your report.
You can set the schedule to end after a specific number of occurrences, end after a specific date, or no end.
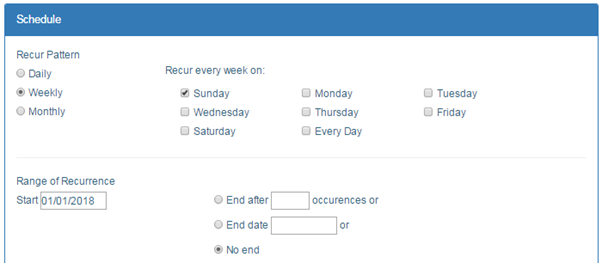
Weekly
Weekly reports are scheduled to send on a specific day of the week. You can select multiple days if you wish. Reports will be sent at 00:01 AWST on that day, so a report recurring on a Sunday will be sent on a Sunday morning.
Set the Range of Recurrence start date to be the day that you wish to begin receiving your report.
You can set the schedule to end after a specific number of occurrences, end after a specific date, or no end.
Monthly
Monthly reports will be sent on the first day of the month.
Set the Range of Recurrence start date to be the day that you wish to begin receiving your report.
You can set the schedule to end after a specific number of occurrences, end after a specific date, or no end.
Click Create at the bottom of the page to save your schedule.
To view, edit and remove schedules, click Data Export Schedules at the top of the page.
To change any details of your schedule, click the Edit icon next to the relevant schedule.
To permanently remove a schedule, click the Remove icon next to the relevant schedule.
