Client Profiles and Agent Codes
Client Profiles and Agent Codes allow special rates to be offered and only accessible by a code.
Creation
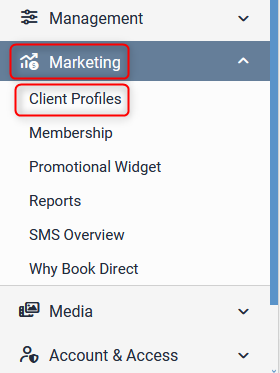
First you will need to create a basic Client Profile: go to Marketing > Client Profiles:
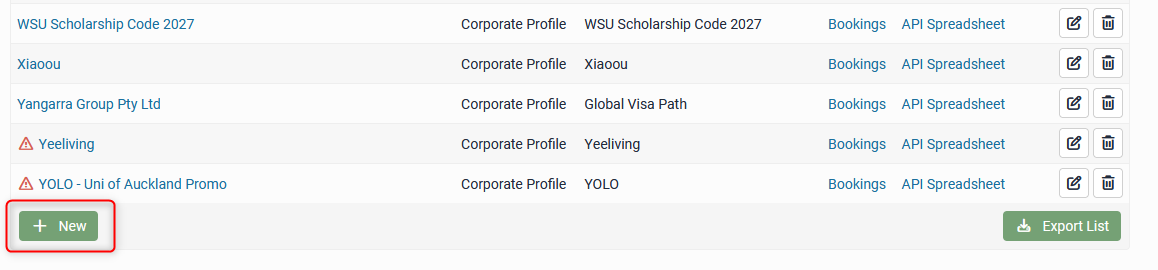
Here you can view and edit existing profiles, and create new Client Profiles. To add a new Client Profile, click the +New button:
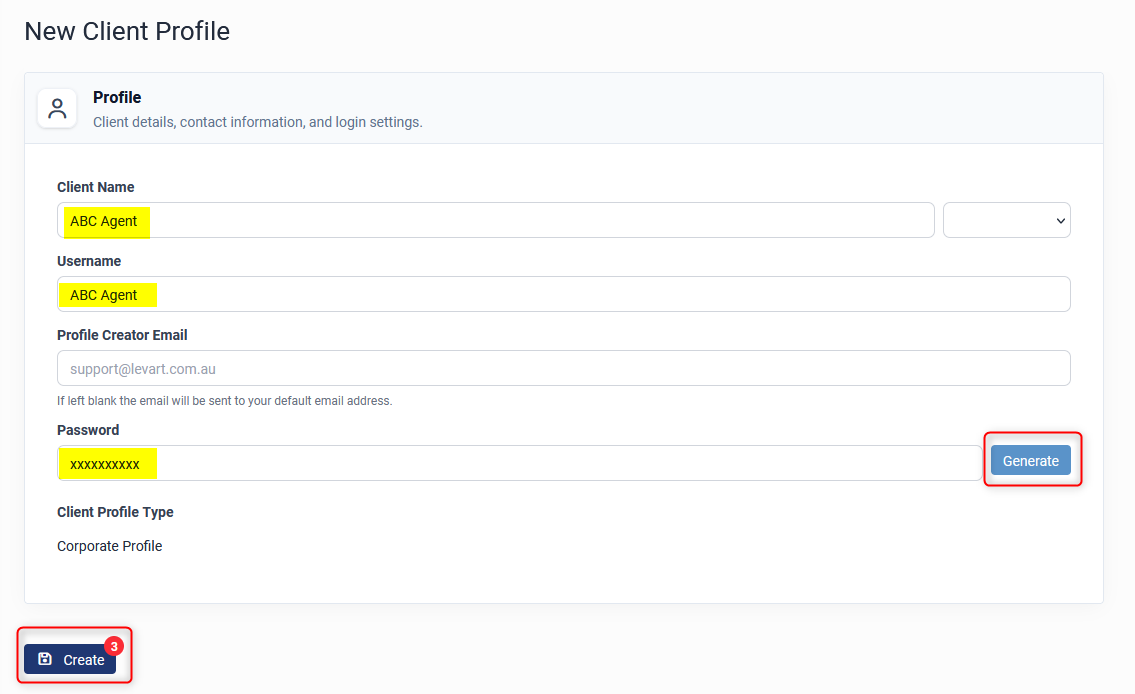
Profile
- Add Client Name - ensure this is something that clearly identifies who this profile/code is for
- Add Username - this is not used but must be entered. You can copy the client name here
- Profile Creator Email - put in the email address for who is creating this profile. If left blank, it will send to the default email address
- Password - this is not used but must be entered. Click Generate for it to create a random password
- Click Create
Contact Details and Welcome Message sections can be ignored/left blank. These are not used or seen in the application process.
Once you have saved your Client Profile, an email will be sent to the email address entered in the Profile Creator Email textbox. This will contain the login details for the Client Profile, however, when using a Promo Code these are not required.
Rates
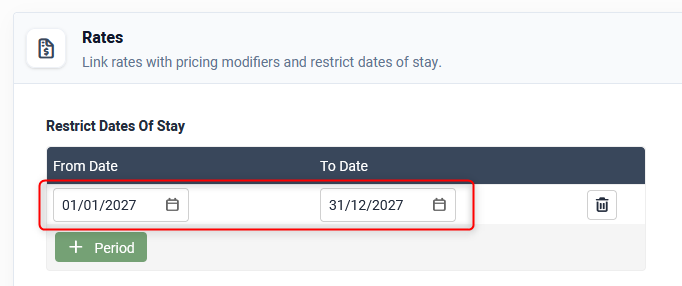
If the profile is only available for certain stay dates, enter the dates in the the Restrict Dates of Stay. Otherwise, leave this section blank
Promo Codes
Click +Promo Code
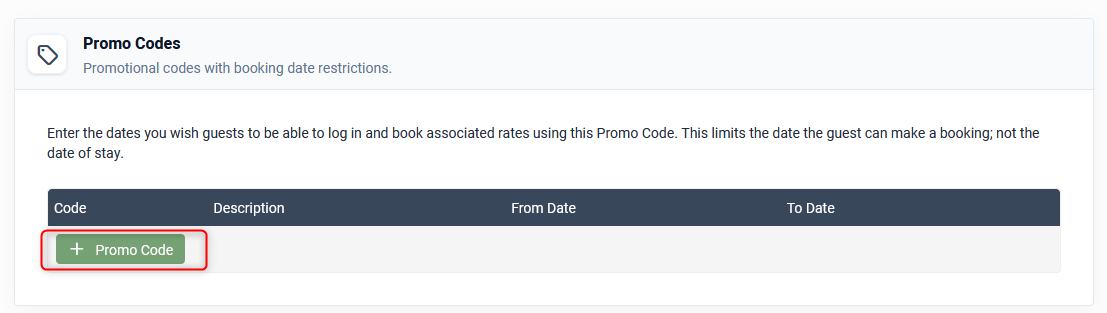
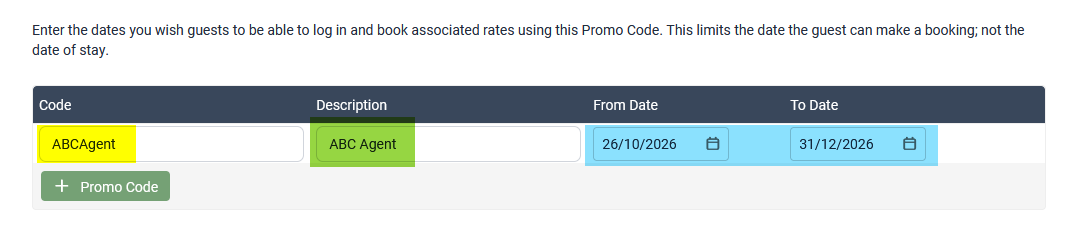
Enter the text that you wish to be the Promo/Agent Code in the Code textbox.
Enter a brief description in the Description textbox. This is purely for your reference in the future – students/agents cannot see this field.
Enter the dates that you wish students/agents to be able to log in and reserve associated rates using this Promo Code. This limits the date the student/agent can make an application, not the dates of stay
Click Update to save this Promo Code.
Export to Properties
The profile must now be exported to all relevant properties that this code is available on.
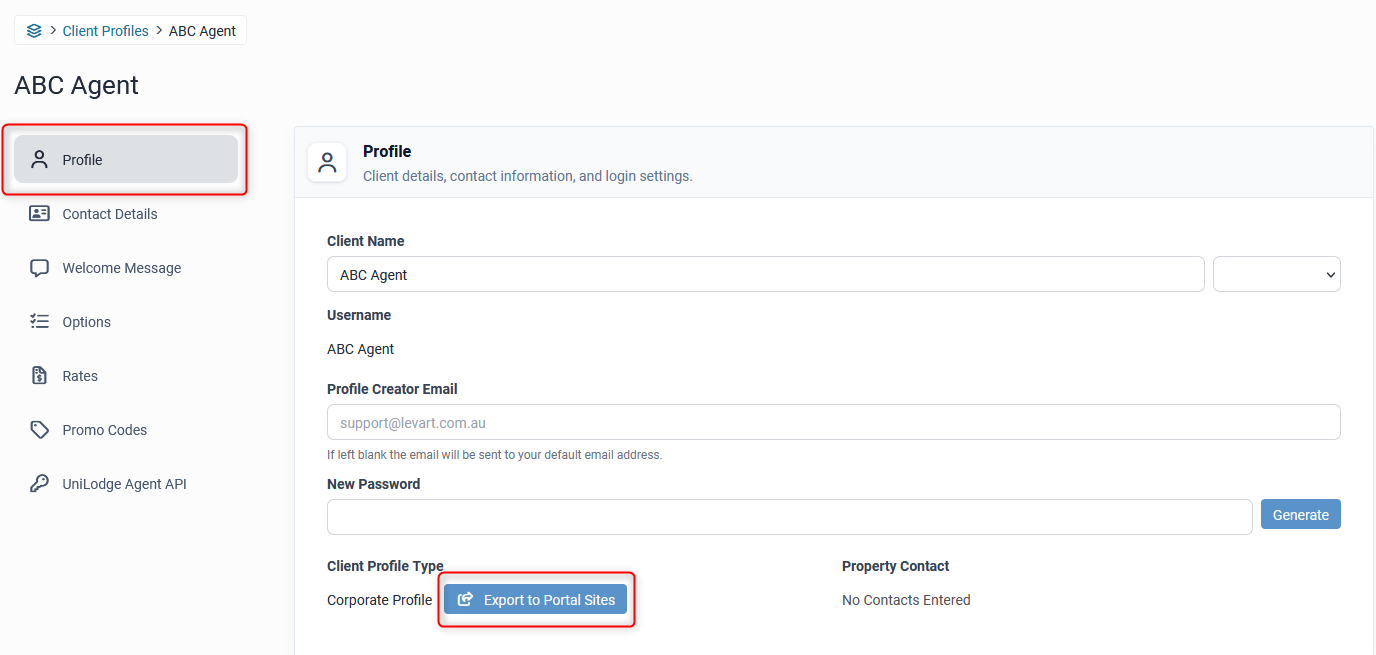
Scroll back up to the Profile Section and click Export to Portal Sites
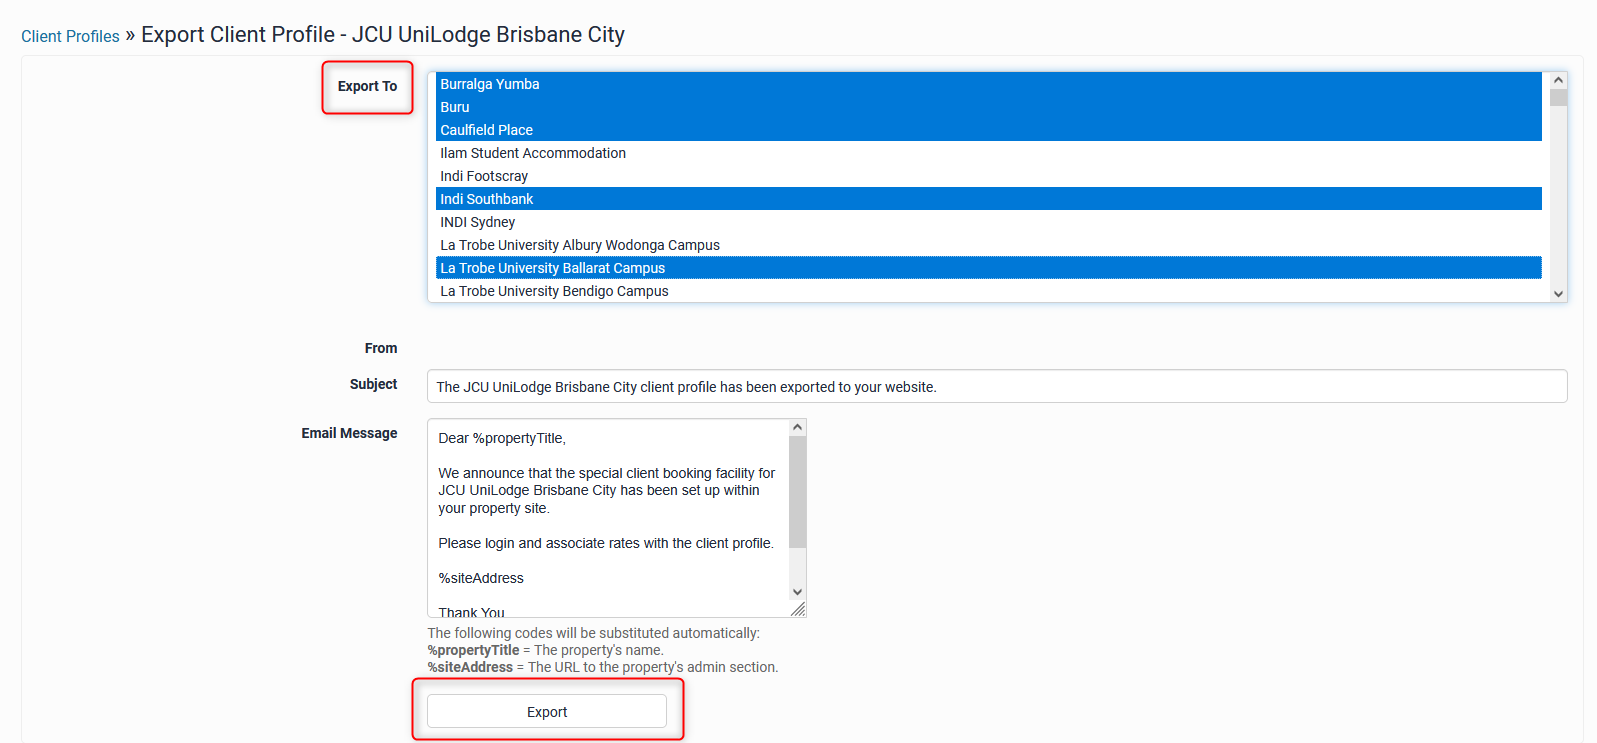
Select all the properties to export this profile to. Use CTRL + Select to select multiple properties. Or CTRL + A to select all. Then click Export
Assign Rates
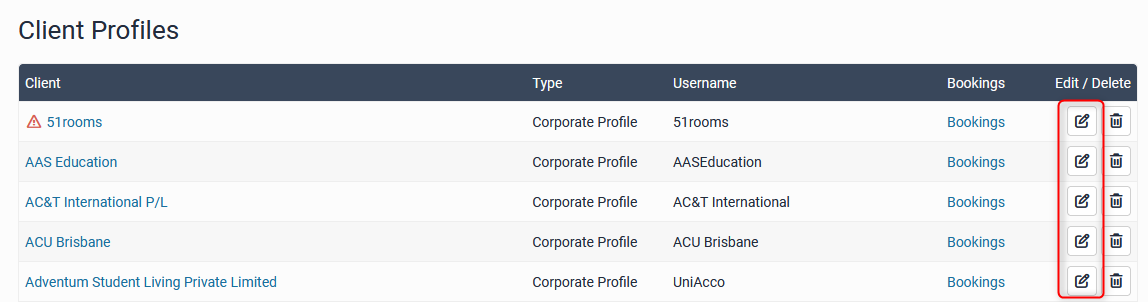
Now log in to the individual property admin to assign the rates to the code. Again go to Marketing > Client Profiles > select the relevant profile to edit
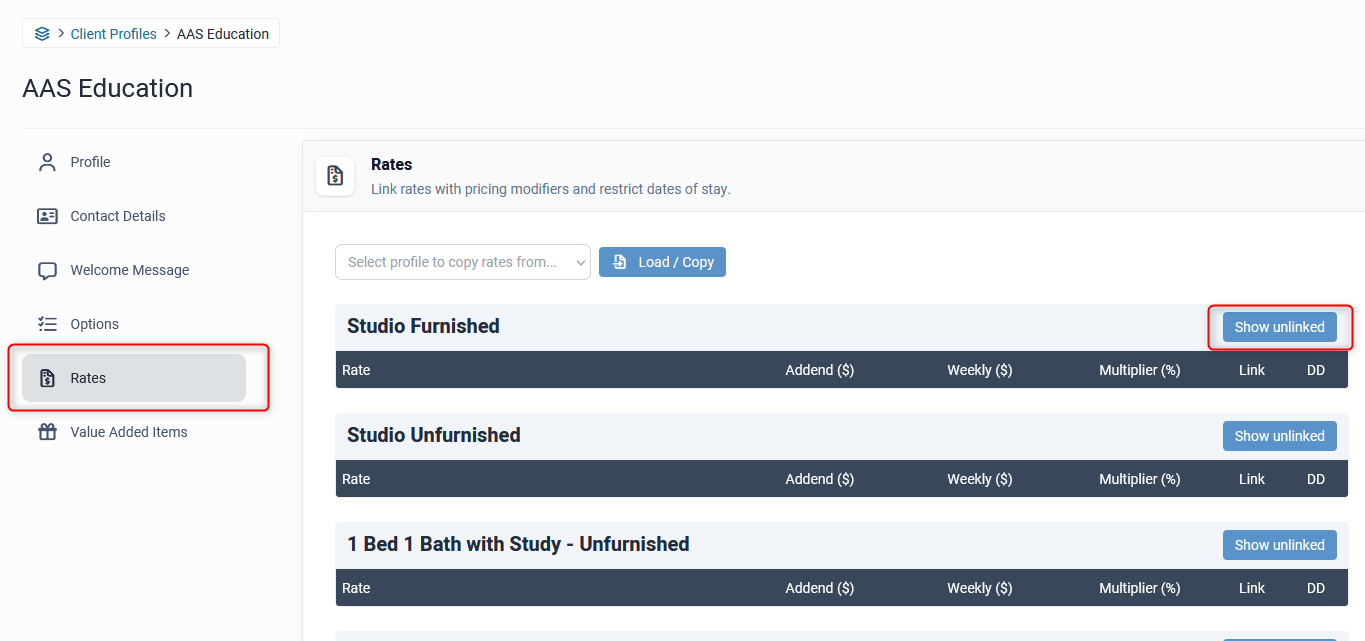
Go to the Rates section and click Show Unlinked for each room type you need to link to the profile
All unlinked rates will show greyed out. Click the Link icon to link all required rates to the profile

Once the rates have been linked, you can then add a Multiplier (percentage) or Addend (dollar amount) figure to adjust the rate (i.e. apply a discount or make more expensive). This will only apply to applications made on this rate once a student/agent is logged in to this specific Profile.
If doing a dollar amount, apply this in the Weekly field.
Rate adjustment summary
| Adjustment | Type | Figure |
|---|---|---|
| Increase 10% | Multiplier | 1.1 |
| Decrease 10% | Multiplier | 0.9 |
| Increase $20 weekly | Addend Weekly | 20 |
| Decrease $20 weekly | Addend Weekly | -20 |
If you wish to offer this rate at the price set in your Rate Types page – leave the Multiplier and Addend boxes unchanged

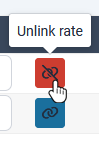
To unlink a rate, click the Link icon next to that rate
Click Update to save your changes.
Once you have completed this setup you can then provide the code to students/agents.
Should you need any assistance with this please contact Levart Support unilodge@levart.com.au